Alongside the more common HS and HIF units, classic British saloons and sports cars frequently use older H-type SU carburettors as well as two specialised SU cold-start systems: the Auxiliary Enrichment Carburetter (Thermo) and the Automatic Enrichment Device (AED). Each has distinct jet-centring, cleaning and adjustment rules.

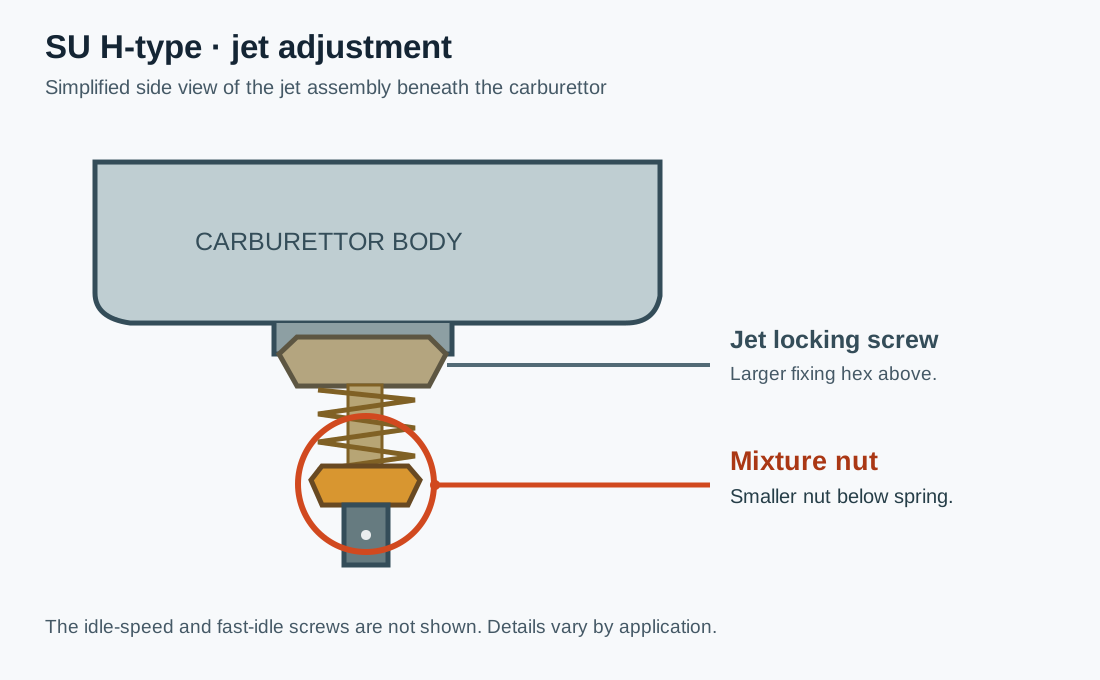
H-type adjustment diagrams
SU Carburetters publishes an illustrated H-type diagram and an H-type tuning guide covering the throttle adjusting screw, jet adjusting nut and fast-idle screw. For the separate enrichment devices, use SU’s Thermo section drawing and adjustment guide, which shows the needle stop and H-type jet adjusting screw, or its AED tuning diagram, which identifies the mixture needle adjuster (13), fast-idle screw (5) and needle-lift screw (4).
1. SU H-type routine servicing and jet centring
Unlike HS (nylon tube) and HD (diaphragm seal) units, the classic H-type seals its sliding jet through cork gland washers and uses an adjustable jet-bearing assembly. If the piston fails to drop onto the bridge with a clean metallic click when the jet is raised fully, centre the jet (SU H-type routine servicing):
- Disconnect and swing aside the jet control linkage; mark the jet assembly position for reassembly, withdraw the jet, remove the jet locking spring, refit the adjusting nut and wind it fully up.
- Refit the jet (keeping the jet head aligned to the control lever) and slacken the jet locking nut until the bearing assembly is free to rotate slightly.
- Remove the piston damper and press gently down on the top of the piston rod (e.g. with a pencil) to centre the needle in the jet bore, then tighten the jet locking nut while holding the jet hard up against the adjusting nut.
- Re-check that the piston drops cleanly onto the bridge with a click, reconnect the linkage, and top up the damper with thin oil (SAE 20).
H-type float level & cleaning: remove and invert the float-chamber lid; with the needle on its seat, an 11.0 mm (7/16 in) round bar should just fit between the forked lever and the lid lip. Clean the suction-chamber bore and piston diameters using a petrol- or methylated-spirit-moistened cloth, lightly oil the piston rod only, and ensure the needle shoulder sits flush with the piston base.
2. Auxiliary Enrichment Carburetter ("Thermo" unit)
Fitted to selected H-type multi-carburettor installations (such as Jaguars, Daimlers and Alvis models), the SU Thermo auxiliary carburettor is a separate electrically solenoid-operated enrichment unit drawing fuel from the main float bowl (SU Thermo operation & tuning).
- Control: switched either by a cylinder-head coolant thermostat set to bring the unit in below
35°C(95°F) or by a dashboard switch with warning light. - Operation: when energised and manifold vacuum drops slightly as the throttle opens, the solenoid lifts a ball-jointed disc valve against a conical spring, drawing fuel from the auxiliary well past a suction-controlled needle into the manifold. If the disc valve leaks against its seat when switched off, it will upset hot idling on the main carburettors.
- Tuning: always tune the main H-type carburettors first (note that Thermo-equipped H-types adjust main mixture via a slotted screw beneath a cap nut—screwing up weakens, screwing down enriches). With the engine warm and the Thermo solenoid manually earthed/switched on, momentarily blip the throttle to lift the valve, then turn the Thermo stop nut clockwise (weaken) until erratic running, and anti-clockwise (enrich) past the fast-idle peak until over-richness drops speed to
800–1,000 rpmwith noticeably dark exhaust.
3. Automatic Enrichment Device (AED) servicing precautions
Later Jaguar/Daimler and Austin/Rover saloons replaced the Thermo with a standalone AED sub-carburettor bolted to the manifold. SU/Burlen emphasises that the AED is a factory-calibrated precision instrument whose bi-metal strips must never be bent or distorted (SU AED servicing guide; AED dismantling):
- Permitted workshop servicing: check external connections, clean/replace the inlet filter, clean the float chamber and needle valve, inspect/replace the main-valve and needle diaphragms, reset/replace the float, and check air-entry elbow and bleed drillings.
- Cleaning rules: wash parts in clean petrol or paraffin only and dry with lint-free nylon cloth—never fluffy or linty rags that can block tiny air-bleed drillings.
- Protect the protruding brass jet tube: when inverting the main AED body to remove the lower needle-diaphragm cap, rest the casting on a wooden block drilled to clear the brass jet tube; applying any load to the jet tube alters its factory height calibration (SU AED overhaul notes).
- Record needle turns: before unscrewing the AED jet needle from the valve body, count the exact number of turns/flats so baseline calibration is not lost.
Related pages
- SU carburettors: types, sizing and models
- SU carburettor troubleshooting, servicing and mixture adjustment
- SU needle profile database
- Carburettors (section overview)