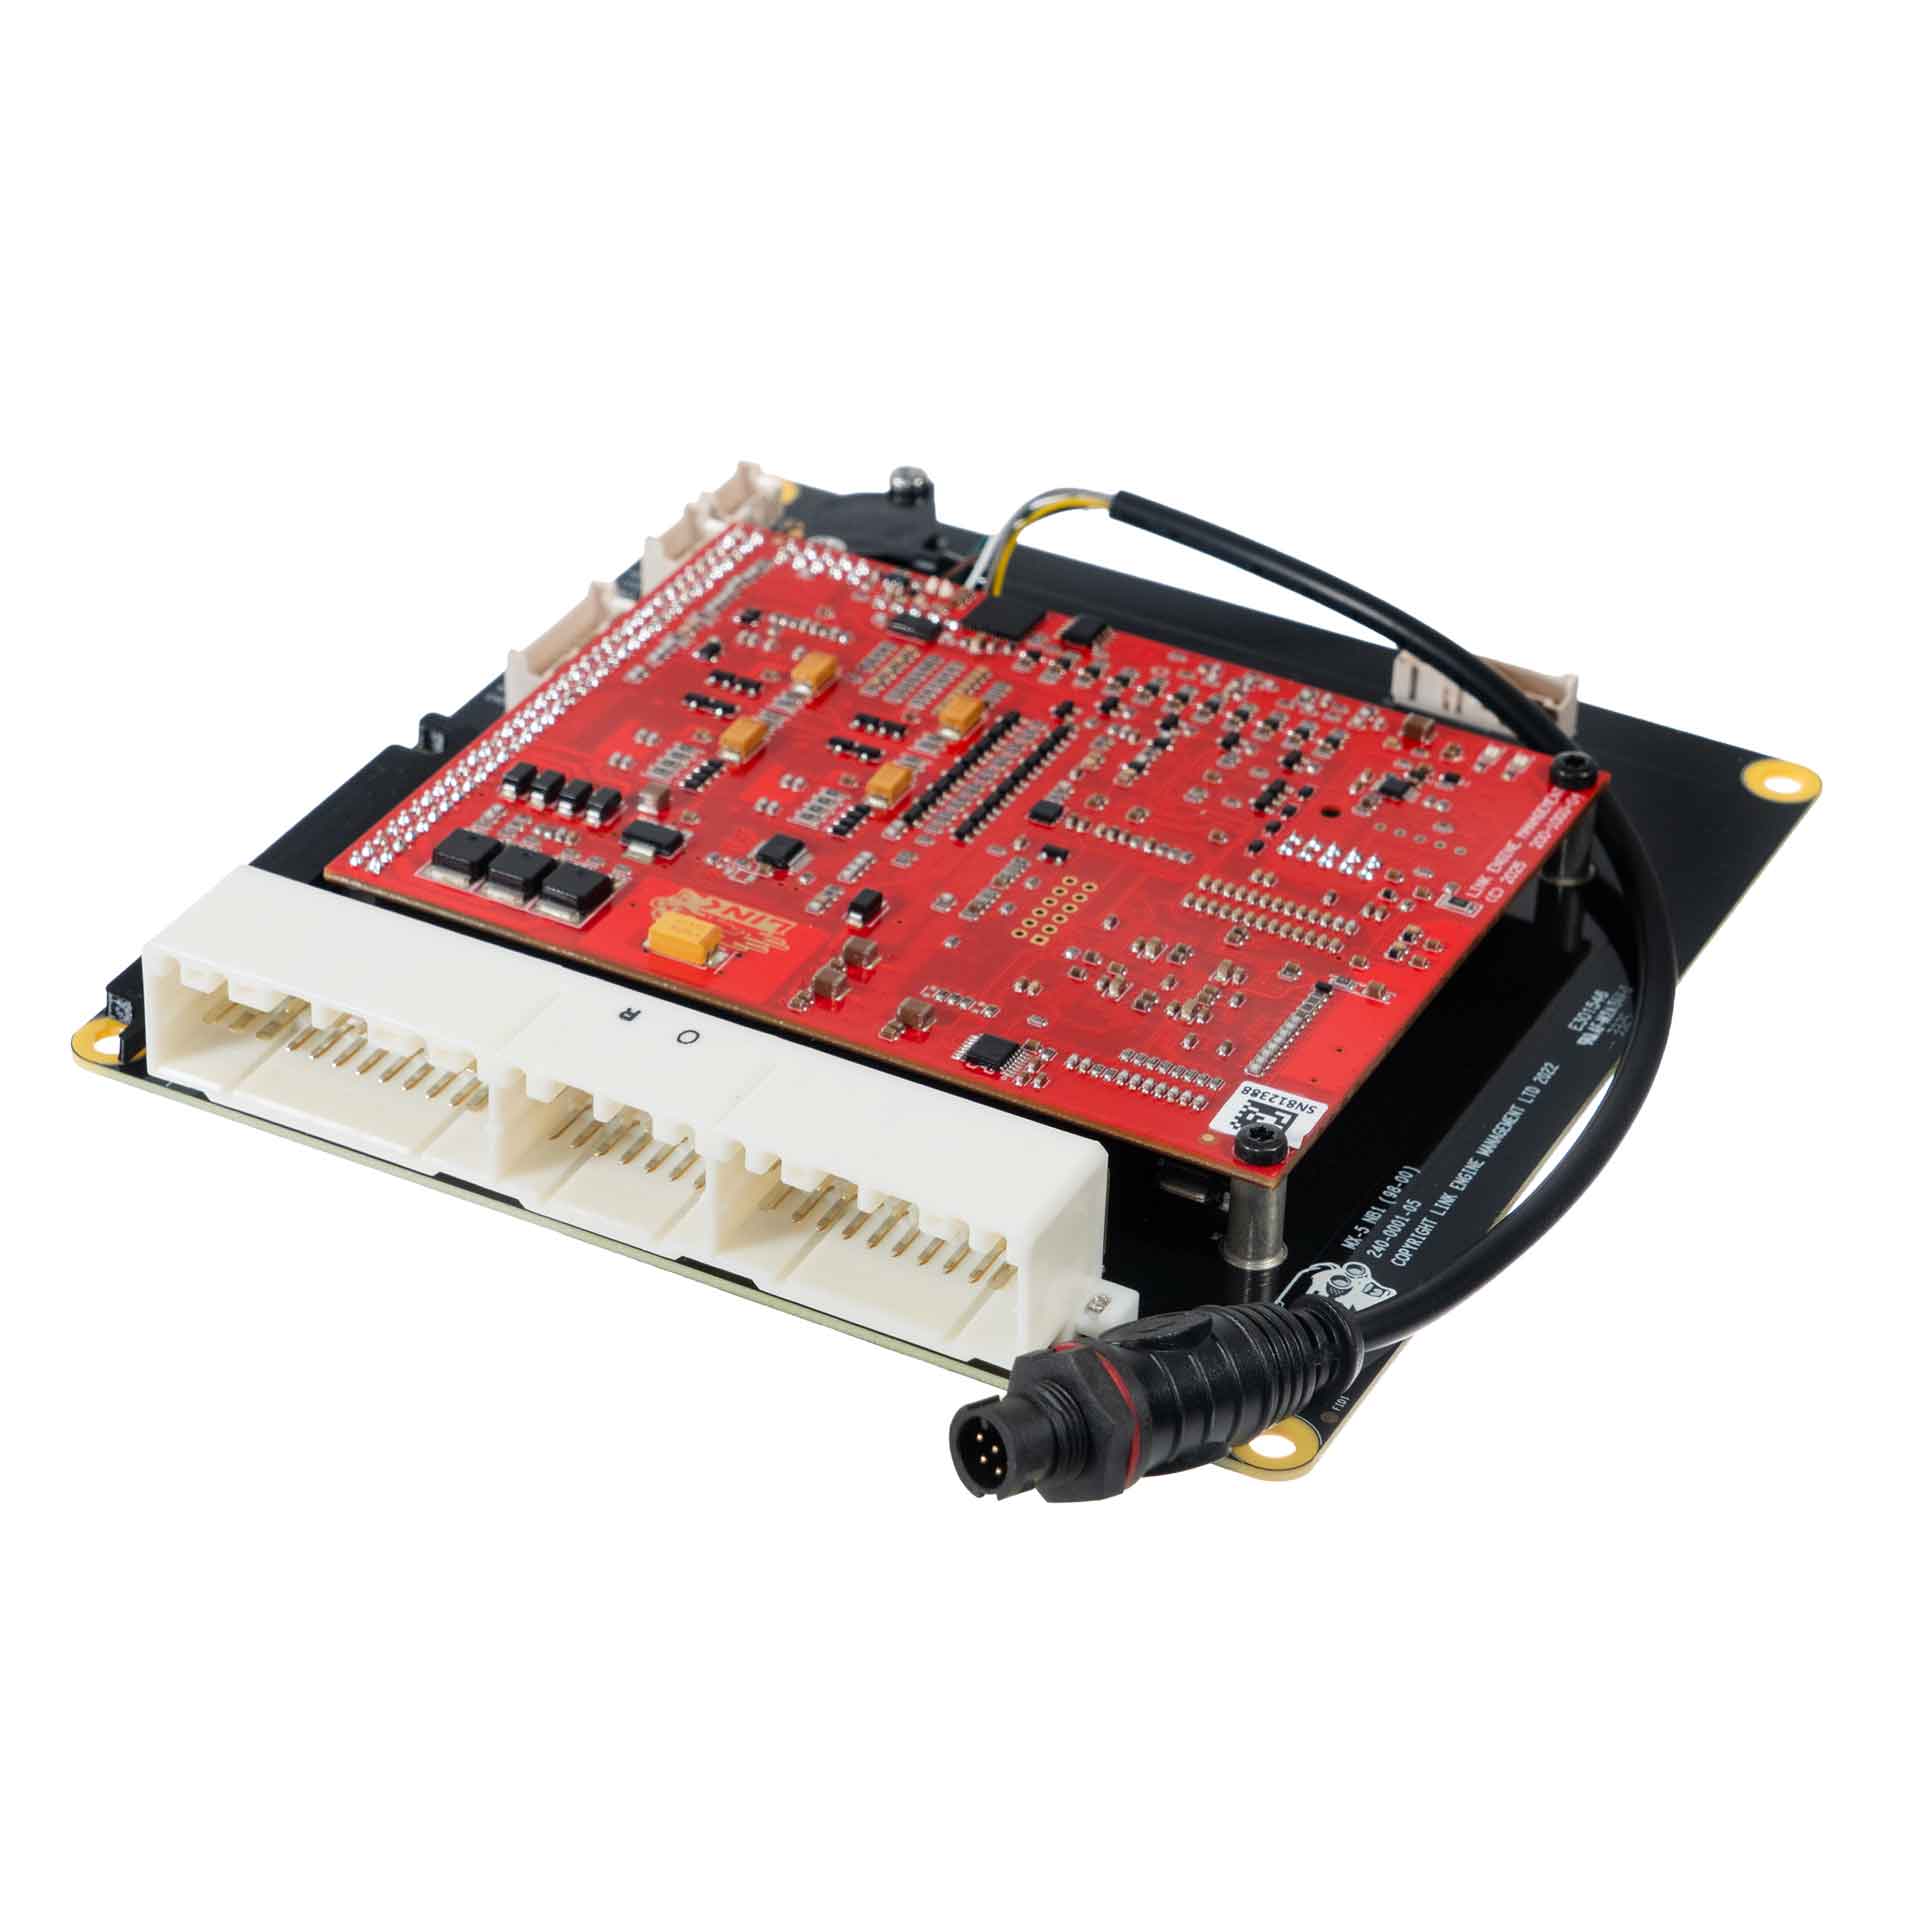
Link G4X MX5X NB1 is a vehicle-specific programmable plug-in ECU for the Mazda MX-5 NB1 application listed in Link's model-specific manuals index. It is an application board, rather than the universal wire-in ECU. Check the exact vehicle, market, engine, original ECU and board part number against the manufacturer's MX5X NB1 installation manual.
Identification and installation
Record the Link model label and revision, donor factory ECU connector and car's engine and year. Plug-in boards connect to particular factory-harness layouts; the family or vehicle name alone does not establish every model-year or transmission combination. The manufacturer manual gives the supported application and any installation or configuration notes for this board.
G4X plug-in platforms offer configurable fuel and ignition control but available channels and features depend on the original header and board. The G4X plug-in general specifications are conditional on the particular application and do not mean every input is brought out to the factory harness.
Pinout and tuning
The MX5X NB1 installation manual is the model-specific source for board pinouts, expansion connections, electrical cautions and startup configuration. Use its connector orientation and the exact board version; do not copy a wire-in ECU pinout onto a factory harness. PCLink and manual downloads; Link manufacturer overview.
MX5 NB1 connector pinouts
From Link’s MX5 NB1 installation manual, pages 15–16. The main-header pin number and Mazda cavity designation are shown; Link says the views look into the ECU from the wire side. “nc” is reproduced from the manual. * identifies features present in some models only. Check the exact ECU and loom before wiring.
| Pin | Mazda cavity | ECU channel | Vehicle function |
|---|---|---|---|
| 1 | 3Y | Injector 3 | Injection |
| 2 | 3W | Injector 1 | Injection |
| 3 | 3U | Aux 11 | CDCV* |
| 4 | 3S | An Volt 3 | EGR Boost Sensor* |
| 5 | 3Q | Aux 4 | VICS Solenoid |
| 6 | 3O | Aux 1 | ISC Solenoid |
| 7 | 3M | +14V | ISC Solenoid |
| 8 | 3K | An Volt 5 | Fuel Level* |
| 9 | 3I | DI 1 | Clutch Switch* |
| 10 | 3G | Ignition 1 | Ignition |
| 11 | 3E | An Volt 2 | TPS |
| 12 | 3C | Ground | |
| 13 | 3A | Ground | |
| 14 | 3Z | Injector 4 | Injection |
| 15 | 3X | Injector 2 | Injection |
| 16 | 3V | Injector 5 (Aux) | Rear NB O2 Heater* |
| 17 | 3T | Ignition 6 (Aux) | EGR Boost Solenoid* |
| 18 | 3R | nc | |
| 19 | 3P | Ignition 5 (Aux) *** | Fuel Pump Relay (Euro, Aus) |
| 20 | 3N | Ignition 5 (Aux) *** | Fuel Pump Relay (JDM/USA) |
| 21 | 3L | Aux 12 | Purge Solenoid |
| 22 | 3J | An Volt 6 | Rear NB O2 Signal* |
| 23 | 3H | Ignition 2 | Ignition |
| 24 | 3F | Ground (Signal) | |
| 25 | 3D | nc | |
| 26 | 3B | Ground | |
| 27 | 2O | Aux 7 | EGR* |
| 28 | 2M | Aux 5 | EGR* |
| 29 | 2K | Aux 2 | Tacho |
| 30 | 2I | +5V Out | |
| 31 | 2G | nc | |
| 32 | 2E | An Temp 1 | ECT |
| 33 | 2C | An Volt 7 | Front NB O2 Signal |
| 34 | 2A | An Volt 8 | Fuel Tank Pressure* |
| 35 | 2P | Aux 8 | EGR* |
| 36 | 2N | Aux 6 | EGR* |
| 37 | 2L | An Volt 4 | MAF** |
| 38 | 2J | Trig 1 | Crank Sensor |
| 39 | 2H | Trig 2 | Cam Sensor |
| 40 | 2F | Knock 1 | Knock Sensor |
| 41 | 2D | DI 2 | Gearbox Speed |
| 42 | 2B | An Temp 2 | IAT |
| 43 | 1U | Injector 6 (Aux) | Front O2 Heater* |
| 44 | 1S | Aux 13 | AC Clutch |
| 45 | 1Q | Aux 14 | Charge Light |
| 46 | 1O | Aux 3 | Alternator Control |
| 47 | 1M | Injector 6 (Aux) | Front O2 Heater |
| 48 | 1K | nc | |
| 49 | 1I | Aux 15 | Condenser Fan |
| 50 | 1G | DI 3 | PS Pressure Switch |
| 51 | 1E | Injector 7 (Aux) | CE Light |
| 52 | 1C | nc | |
| 53 | 1A | Constant +12V | |
| 54 | 1V | DI 4 | Neutral Switch |
| 55 | 1T | nc (Alt Voltage) | |
| 56 | 1R | Injector 8 (Aux) | Cooling Fan |
| 57 | 1P | DI 5 | AC Request |
| 58 | 1N | nc | |
| 59 | 1L | nc | |
| 60 | 1J | nc | |
| 61 | 1H | nc | |
| 62 | 1F | DI 6 | Brake Switch |
| 63 | 1D | nc | |
| 64 | 1B | +14V | ECU Power |
** The factory MAF requires its pull-down jumper installed. *** The fuel-pump jumper selects 3P for Europe/Australia or 3N for Japan/USA, not both. The source lists both 1U and 1M as injector 6 (Aux) for the front O2 heater; retain this distinction and verify the wiring for the vehicle. Bottom board V1.3 (240-0001-03) may need minor case trimming because of header placement.
Expansion connector
| Pin | ECU channel |
|---|---|
| 1 | +14V |
| 2 | An Temp 4 |
| 3 | An Temp 3 |
| 4 | DI 9 |
| 5 | DI 8 |
| 6 | DI 7 |
| 7 | Ignition 4 |
| 8 | Ignition 3 |
E-throttle connector
| Pin | ECU channel |
|---|---|
| 1 | Ground (Signal) |
| 2 | +5V Out |
| 3 | An Volt 12 |
| 4 | An Volt 11 |
| 5 | An Volt 10 |
| 6 | An Volt 9 |
| 7 | Aux 10 |
| 8 | Aux 9 |
The e-throttle relay is Aux 16; follow Link’s full installation and configuration instructions.
CAN 1 and CAN 2 connectors
Each has the following assignment:
| Pin | Function / cable colour |
|---|---|
| 1 | Ground (black) |
| 2 | CAN L (green) |
| 3 | CAN H (white) |
| 4 | +14 V (red) |
The internal MAP sensor uses An Volt 1. Signal ground is for isolated sensors and must not be connected to chassis ground.