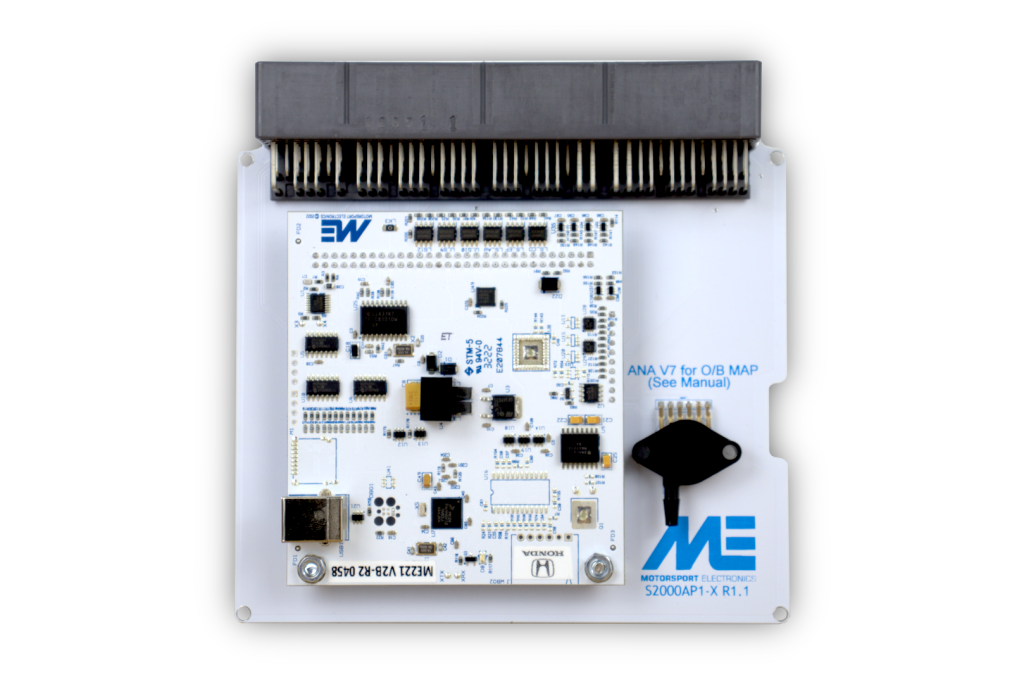
ME221 plug-in ECU for Honda S2000 AP1. This application-specific unit replaces the factory ECU electronics while using the vehicle's original harness connector, subject to exact fitment and configuration. Motorsport Electronics product information · application installation guide.
Identification and application
ME's installation guide identifies Honda S2000 AP1 2000–05, whereas the product page describes 2000–04. Check the particular ECU and market rather than relying on year alone. Record the serial, board version, firmware, factory ECU part number, engine and transmission before installing. The ME221 and ME442 are separate hardware choices; the manufacturer lists wideband, onboard logging and EGT as ME442 plug-in features. Optional electronic throttle equipment and supported functions vary by board and configuration. See ME's model comparison and downloads.
Connector and pinout
Use the OEM header and auxiliary connector diagrams in the exact application installation guide. Connector view, jumper/switch settings, sensors and supported functions vary by generation and vehicle. The universal 28-way and 90-way wire-in tables do not define this plug-in board's factory header.
Software and installation
Use the correct MEITE / EZ Tune release and the model-specific firmware and base map. The installation guide covers sensor settings, baseline checks, expansion, jumper settings and any vehicle-specific exceptions; a base map still needs calibration and verification on the actual engine. See the ME221 family page for wire-in generation and hardware context.
Sources reviewed 17 November 2026.
Manufacturer S2000 connector schedules
These are the positions explicitly listed in Appendix A of the manufacturer’s ME221/ME442 S2000 AP1 Gen1 and Gen2/2B installation guide. The two I/O columns reflect the guide’s distinct board generations. A dash or “not specified” preserves the source’s missing entry; it does not establish that a cavity is unconnected. The actual model, generation, DBW hardware and firmware determine available functions. The guide identifies the D connector as TE 179678-6.
| Pin | Vehicle / connector function | GEN1 I/O | GEN2 / GEN2B I/O |
|---|---|---|---|
| A1 | Coolant dashboard gauge | LS10 | LS 3 |
| A2 | Air control valve | drvSLS7 | LS 7 |
| A3 | EVAP bypass solenoid vent | drvSLS8 | LS 16 |
| A4 | EVAP canister vent | LS 2 | LS 8 |
| A6 | EVAP purge | LS 1 | LS 4 |
| A9 | VSS | HS DIGIN 1 | DIGIN 4 |
| A12 | Immobiliser indicator light | drvSLS4 | LS 17 |
| A15 | Fuel pump relay | drvSLS1 | LS 11 |
| A17 | AC clutch relay | drvSLS5 | LS 14 |
| A18 | CEL light | drvSLS2 | LS 13 |
| A19 | Tacho output | TACHO | TACHO |
| A20 | Primary radiator fan | drvSLS3 | LS 15 |
| A27 | AC switch signal | drvDIGIN3 | DIGIN 5 |
| A28 | Air pump relay | drvSLS6 | LS 18 |
| A29 | Fuel tank pressure sensor | ANAV 6 | ANAV 6 |
| A30 | Electronic load detector | ANAV 9 | ANAV 5 |
| B1 | Switched 12 V ignition | 12VIGN | 12VIGN |
| B3 | Injector 2 | LS 5 | Injector 2 |
| B4 | Injector 3 | LS 6 | Injector 3 |
| B5 | Injector 4 | LS 7 | Injector 4 |
| B11 | Injector 1 | LS 4 | Injector 1 |
| B12 | VTEC solenoid | LS 12 | COIL 5 |
| B14 | Spare low-side 9 A driver | LS 11 | LS 1 |
| B15 | Spare low-side 9 A driver | LS 9 | LS 2 |
| B23 | Idle control valve | LS 3 | LS 9 |
| C3 | Knock sensor positive | Knock 1 | Not specified |
| C4 | Ignition coil 1 | COIL A | Coil 1 |
| C8 | Crank signal positive | Not specified | Not specified |
| C9 | Crank signal negative | Not specified | Not specified |
| C12 | Ignition coil 2 | COIL B | Coil 2 |
| C13 | Ignition coil 3 | COIL C | Coil 3 |
| C14 | Ignition coil 4 | COIL D | Coil 4 |
| C15 | O2 signal 2 | ANA-V7 | — |
| C16 | O2 signal 1 | ANA-V3 | AnaV 3 |
| C17 | MAP signal | ANA-V1 (OEM MAP) | OEM MAP ANAV1; on-board 4 bar ANAV4 |
| C20/C21 | Cam positive / cam negative | Not specified | Not specified |
| C22 | Knock sensor negative | Not specified | Not specified |
| C25 | Intake air temperature signal | ANA-T1 | ANAT 1 |
| C26 | Coolant sensor signal | ANA-T2 | ANAT 2 |
| C27 | Throttle position signal | ANA-V2 | ANAV 2 |
| D1 | GEN1 digital input / GEN2 injector | drvDIGIN1 | Injector 5 |
| D2 | GEN1 digital input / GEN2 injector | drvDIGIN2 | Injector 6 |
| D3 | GEN2 spare low side | — | Injector 7 |
| D4 | GEN1 digital input / GEN2 injector | drvDIGIN4 | Injector 8 |
| D5 | GEN2 spare analogue input | — | ANAT 3 |
| D6 | GEN2 spare analogue input | — | ANAT 4 |
| D7 | GEN2 DBW HBA 1 | — | DBW HBA 1 |
| D8 | GEN2 DBW HBA 2 | drvDIGIN5 | DBW HBA 2 |
| D9 | GEN2 low side | — | LS 10 |
| D10 | GEN1 analogue input / GEN2 EGT | Ana-V8 | EGT signal |
| D11 | CAN bus low | CANBus | CANBus |
| D12 | CAN bus high | CANBus | CANBus |
| D13 | 5 V low-current sensor supply | 5V | 5V |
| D14 | Sensor ground | GND | GND |
The guide groups C20/C21 as cam positive / cam negative; verify the actual polarity and connector view with the manufacturer drawing and vehicle loom. It also labels D8 as GEN2 DBW HBA 2 while listing a GEN1 digital input in the adjacent column; the original wording is preserved.
The guide assigns GEN1 LS7 to both A2 and B4. It does not explain that repeated label; verify the board and configuration with Motorsport Electronics before treating these as independent outputs.